
Do you struggle with getting the perfect glam eye look? Or to stop your red lip from smudging all over your face?
ME TOO!
In today’s blog post I have my friend Bianca here to teach us all her tips and tricks that will change your makeup game forever. Bianca is a professional makeup artist located in London/Windsor Ontario. Make sure to check out all her looks over on Instagram @BeautybyBianca_mua. She can also be reached for bookings at mua.beautybybianca@gmail.com.
This was a really fun look to do and I definitely learnt a lot, so I hope that you do to! This look is perfect for Holiday parties and New Years Eve. But before we jump into the post, make sure that you subscribed to my blog to get email updates every time I post, and follow me on Instagram, Facebook and Pinterest to get more updates from me on my day to day life.
Bianca breaks down everything that she did to achieve this look and all her tips and tricks down below! So keep reading to find out how she got this look!
EASY HOLIDAY EYES
Step 1: Prepping Your Eye Lids

The most important step in prepping your lids for shadow is using a primer. This will keep your shadow on longer and prevent creasing! I would recommend one of 2 options:
1. Too Faced Shadow Insurance Eye Lid Primer – For anyone, especially more mature lids this is a great option.
2. Any concealer – If you have more oily lids I would not recommend this. If you have veins or redness this could work really well.
Step 2: Eye shadow Application

This look was created using the Anatasia Beverly Hills Sultry Eye Shadow palette (shown in image above). Alternatively, the Milani 02 Bare Necessities palette would be a great option as well (You can find this at Walmart or Superstore).
For this halo eye look, you want to start with a light neutral or warm toned brown colour in the crease. On Nathalie, I used Twig. To apply, follow these tips:
1. Apply the shadow using a fluffy blending brush. Apply in the natural crease of your eye while your eye is open, (this is especially helpful if you have more hooded eyes) and bring the colour up towards the brow bone.
2. Blend Twig out using Fresh just below the brow.
For the lid, we want to focus the colour Cinder on the ‘outer v’ of your eye, as well as in the inner corner. You want to leave the centre of your lid bare as much as possible to be able to apply Pearl directly in the middle.
1. You can use a flat shader brush, or your finger! Using your finger makes achieving this look super easy.
2. If you use a brush, wet your brush lightly with setting spray. This helps achieve more pigment on your eyelid.
Step 3: Defining The Eyes
As an additional step, you can add liquid liner, or you can use a dark brown or black eye shadow very close to the upper lash line, and on the outer lower lash line, not going all the way to the inner corner. For Nathalie, I used Dystopian from the Sultry palette using a thin liner brush.
1. Stamp your dark shadow close to the upper lash line in stages until you achieve the level of darkness from the shadow you want.
PERFECT RED LIPS
Step 1: Exfoliate Your Lips
For perfect red lips, using a lip exfoliate and a moisturizer is key!
1. Don’t spend money on an expensive lip exfoliate. One of my favourites is the E.L.F Cosmetics Lip Exfoliator.
2. Use your lip moisturizer before you start your makeup. This will ensure by the time you get to your lips they are ready to go, PLUS, it keeps your foundation from sticking to your lips. One of my favourites is the Laneige Lip Sleeping Mask.
Step 2: Defining Your Lips

To prevent your lip colour from bleeding into any fine lines or wrinkles around your lips, use a lip liner. On Nathalie, I used the Pat McGrath Labs Ultra Lip Pencil in Major Red (True Red).
1. Using a universal lip liner can be useful if you own many different lipsticks. One option is the Sephora Collection Universal Lip Liner.
Step 3: Selecting the Perfect Red Shade
One problem you may have is trying to decide which shade of red will look good on you – So how do you choose?
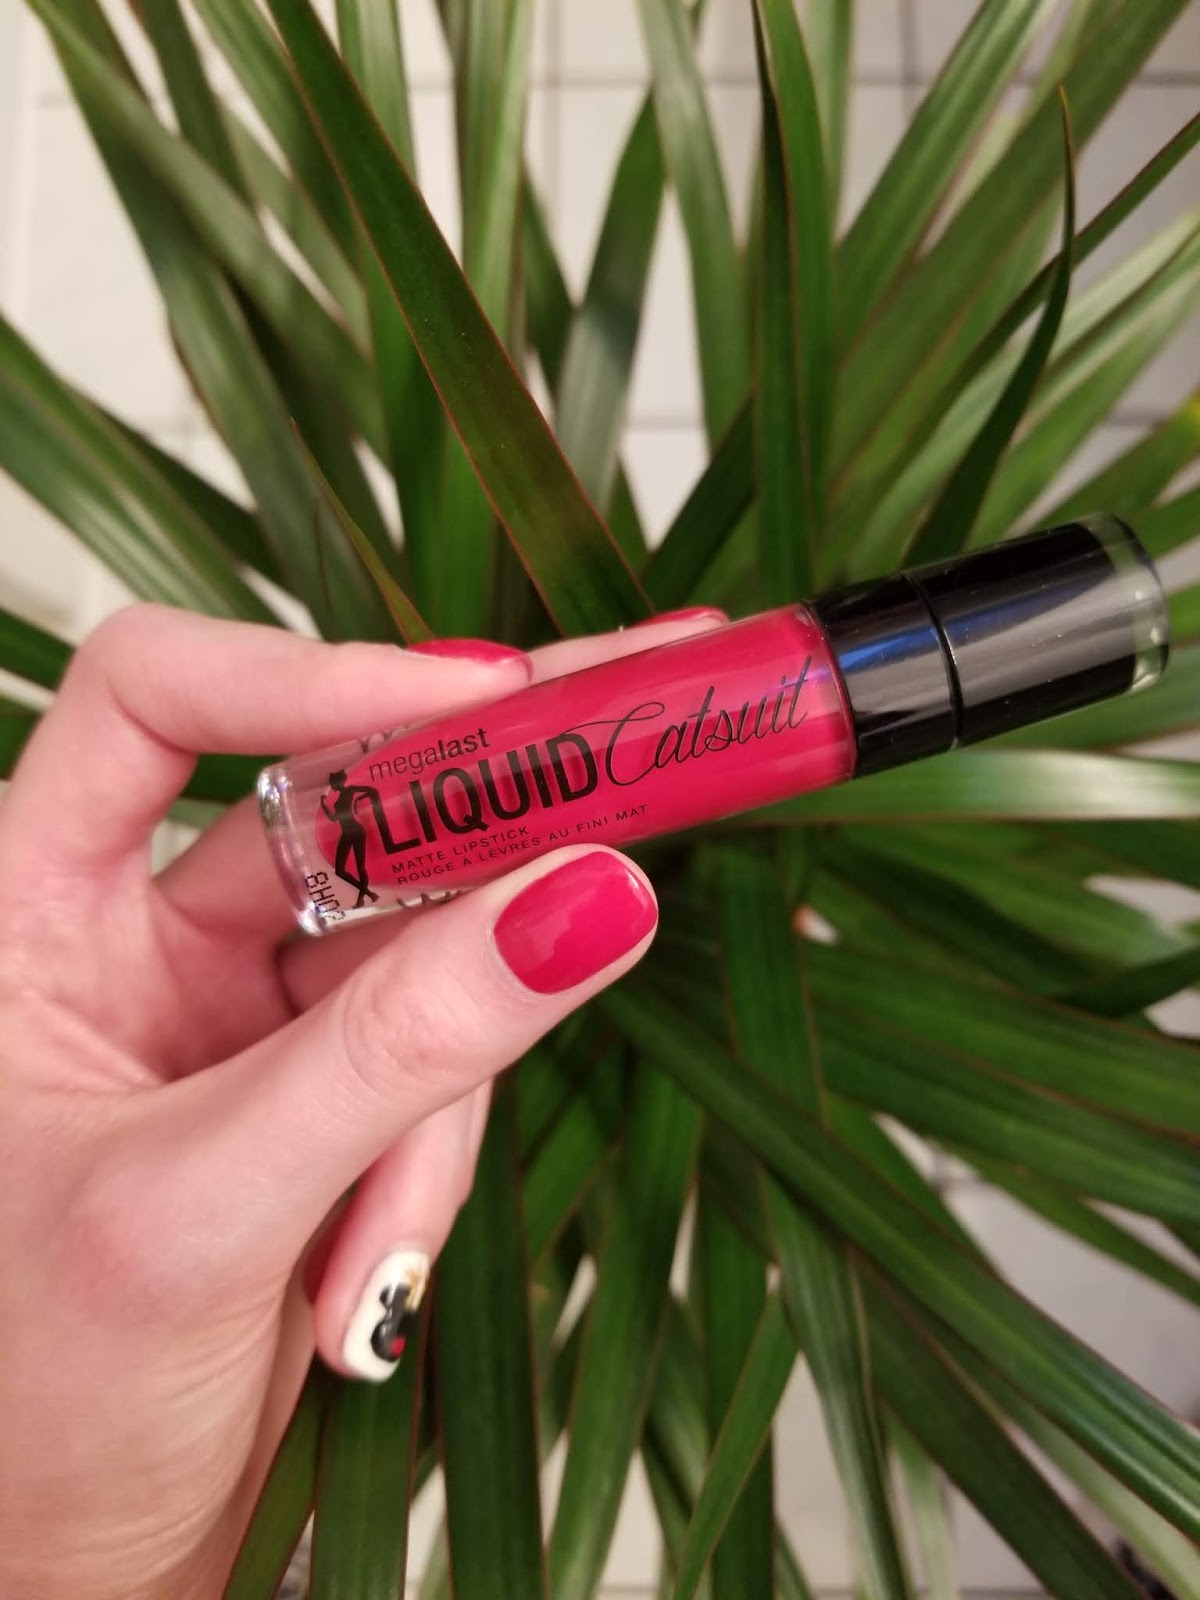
Red lip colours are typically either warm (orange undertone), cool (pink undertone) or blue toned. A universal red, or a blue toned red, will look good on everyone! On Nathalie, I used the MegaLast Liquid Catsuit Matte Lipstick from Wet N Wild in the shade Flame of The Game.
1. Warm reds will look good on those with yellow or golden undertones in their skin, whereas cool reds will compliment those with pink undertones.
2. If you are unsure on wearing a very bright red lip, consider a darker more berry toned red. You may be surprised how well you can pull it off.
Take a look at these swatches to help give you an idea of what different shades of red look like:

FLAWLESS COMPLEXION
Here are the products used for Nathalie’s complexion:
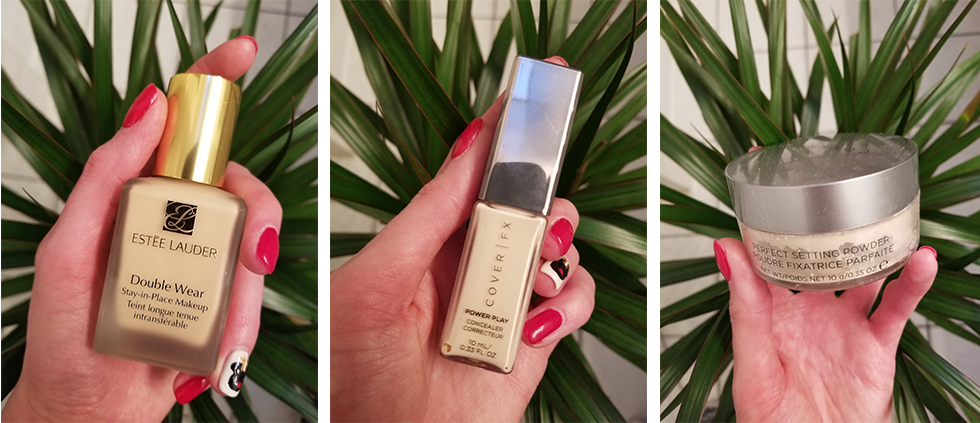
Foundation: Estee Lauder Double Wear Concealer: Cover FX Power Play Powder: Cover FX Perfect Setting Powder
Shade: Cool Bone + Warm Porcelain Shade: N Fair 1 Shade: Light Translucent
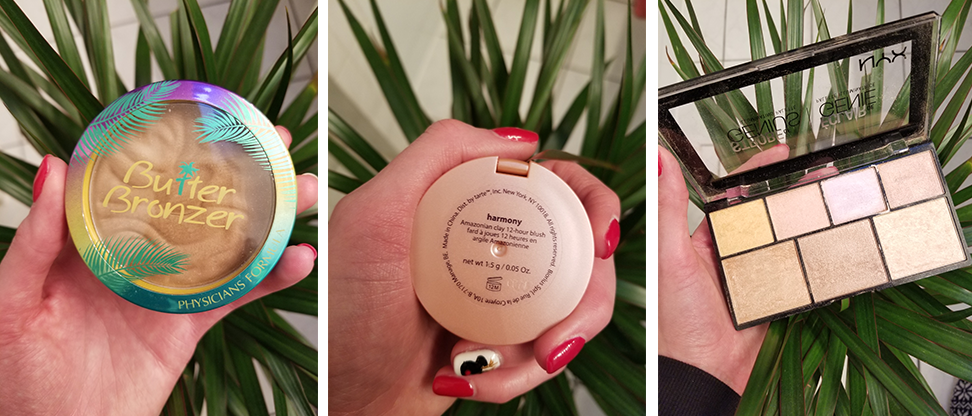
Bronzer: Physicians Formula Butter Bronzer Blush: Tarte Amazonian Clay Blush Highlight Palette: NYX Strobe of Genius
Shade: Harmony

NYX Colour Correcting Concealer Primer: First Aid Beauty Coconut Skin Primer Brows: Benefit Ka Brow
To finish off the face we used the Too Faced Hangover 3 in 1 Setting Spray to lock the look in place.
Thank you so much to Bianca for helping me make this blog post and for all her wisdom. Make sure to follow her on her Instagram and to contact her for makeup for your next event at mua.beautybybianca@gmail.com!
Before you go, make sure that you subscribed to my blog to get email updates every time I post. Also be sure to follow me on Instagram, Facebook and Pinterest to get more updates from me on my day to day life.
Your trusty gutsy gal,
Nathalie xx

One thought on “Tips & Tricks To Change Your Glam Makeup Game Forever”